


User Verification
 Face Verification
 Address Verification
 Document Verification
 Age Verification
 VideoIdent
 Fast ID
 Docless Verification
 Consent Verification
 NFC Verification
Business Onboarding
 Business Verification
 Due Diligence
 Investor Verification
 E-Signature

 QES
QES
Monitoring & Compliance
 AML Screening
 Transaction Monitoring
 Adverse Media
 Business AML Screening
 PEP & RCA
 Sanctions
 Watchlist
Authentication
 Behavioural Biometrics
 Device Fingerprinting
 Biometric Face Authentication
 MFA
MFA
 Fraud Hub
What we doNEW
 Onboarding
 Ongoing Monitoring
 KYC
KYC
 KYB
KYB
 KYI
KYI
 Age Assurance
 Identity Verification
 Workforce IAM
 Candidate Verification
Business OutcomesNEW
 Compliance
 Fraud prevention
 Trust & safety
 Global expansion
 Product Managers
 Compliance Officers
 Fraud Analysts
 Developers
Fraud
 Deepfake Detection
 Bonus Abuse / Promotion Abuse
 Account Takeover
 Synthetic Identity Fraud
 Document Fraud
 Impersonation Fraud
 Multi-Accounting
 Fraud Networks
 Chargeback Fraud
 Money Mule Activity
 Party Fraud
 Regulatory & Compliance Risks
 Fintech
 Crypto
 iGaming
 Forex
Forex
 Social Network
 Marketplace
 Banking
 Gig Economy
 Payments
 Ride Hailing
 Adult Content
Blind Spot Audit Suite
 Blind Spot Audit
 Deepfake Detector
 Liveness Spoofs
 Document Originality
 Document Deepfake
Platform
 Global Trust Platform
 Journey Builder
 Case Management
 Shufti AI
 Fraud Analytics
 Vendor Comparison
 Brand Personalisation
 AI Compliance Co-Pilot
 OCR
OCR
 Secure Capture
 Deployment Options
 Identity Methods
Developers
 API Documentation
 Mobile SDKs
 Service Status
 Help Center
 Contact Us
 Technical Support
 Supported Documents
 Supported Countries
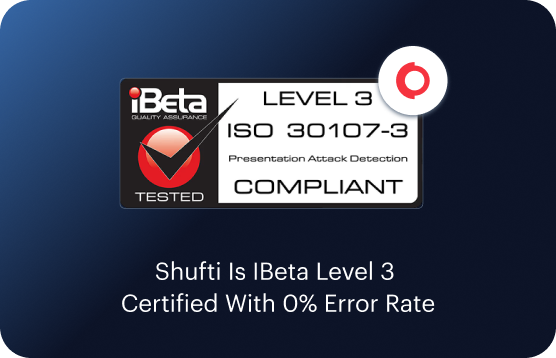
iBeta Level 3 Certified
Europe’s First iBeta Level 3 Certified Liveness Provider
View CertificationsKnowledge Hub
 Content library
 Blogs
Blogs
 News
News
 Reports
 Insights
 Knowledgebase
 ROI calculator
 About
About
 Career
 Press Release
 Certifications
 Partnership
 Awards
Media Studio
 Events & Webinar
 Interactive Demo
 Podcast Studio
 Spotlight Studio
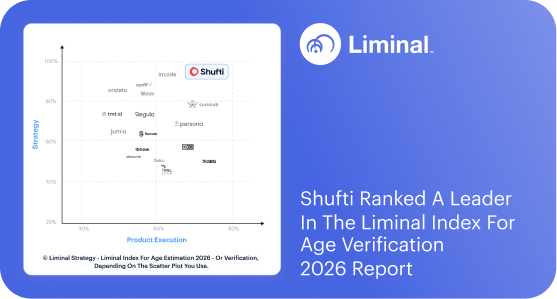
Leader in Age Verification
Industry-recognized leader in age estimation and verification technology with unified identity assurance.
View Full ReportOkta Guide
SAML SSO
Security Assertion Markup Language (SAML) is a standard for logging users into applications based on their sessions in another context. This single sign-on (SSO) login standard has significant advantages over logging in using a username/password:
- No need to type in credentials
- No need to remember and renew passwords
- No weak passwords
Integration using Okta
- Login into your Back-Office account.
- Click on settings
- Click on Security
- Click on SAML Authentication
- Here if you scroll down you have three pre-filled values that you will provide to your identity provider.
- Now Login into your Okta admin account.
- Click on Administration
- Click on Applications
- Click on Create App Integration
- Select SAML 2.0 and click on Next
- Provide the name and logo of the application and proceed by clicking on “Next” button
- Uncheck the “Use this for Recipient URL and Destination URL” checkbox under the Single Sign on URL field
- Copy the Assertion Consumer Service URL from shufti back office settings and paste it into the Single sign-on URL field (Check Steps 1-5)
- Copy Sign on URL from shufti back office settings and paste it into the Recipient URL and Destination URL field (Check Steps 1-5)
- Copy Identifier (Entity ID) from shufti back office settings and paste it into the Audience URI (SP Entity ID) field (Check Steps 1-5)
- Change Name ID format to EmailAdress and Application username to Email from dropdowns
- Proceed by clicking the “Next” button, ensuring that all other settings remain unchanged.
- Select the option “I’m an Okta customer adding an internal app” and click on finish
- Select “Sign on“ tab.
- Scroll down and click on View SAML setup instructions
- Copy Identity Provider Single Sign-On URL from okta and paste it into shufti back office SSO URL field (Check Steps 1-5)
- Copy Identity Provider Issuer from okta and paste it into Shufti’s back office Identity Provider URL field (Check Steps 1-5)
- Copy x.509 Certificate (without BEGIN CERTIFICATE and END CERTIFICATE comments) from okta and paste it into Shufti’s back office Public Certificate field (Check Steps 1-5)
- Now enable SSO from Shufti’s Back Office by clicking on Toggle button on SAML Authentication section (Check Steps 1-5)
- Now click on submit button
- To allow users to login using credentials even when SSO is enabled then uncheck this “Do you want to restrict secondary users from login with their credentials if SSO in enabled?” option and click on submit button
IdP-initiated authentication flow
- User will login into their okta account
- From My App click on the shufti app
SP-initiated authentication flow
- Open Back Office and click on Log in with single sign-on (SSO) instead
- Enter your email
- If SSO is enabled for you, it will take you to your IdP.
- If you are already logged in there it will automatically redirect to the shufti otherwise ask you to enter your credentials and then redirect you to the shufti.
Add User in Okta
- Click on People from okta admin dashboard
- Click on Add Person
- Fill in the user details and click on save
Ps. Email is required - Refresh the page and the user will be added
Assign Application to User
- Click on Application from okta admin dashboard
- Select the application in which you want to add user
- Click on the Assignments tab
- Click on Assign to People
- Click on Assign
- Verify user email and click on save and Go Back